 Exercise transcends mere physical fitness—it's a gateway to a wealth of mental well-being. Yes, it reshapes your physique, elevates your endurance, and rejuvenates your sex life, potentially adding precious years to your lifespan. Yet, beneath these surface transformations lies a deeper motivation for most individuals to embrace an active lifestyle. Regular exercisers are drawn to its profound gift of overall well-being. They bask in heightened vitality throughout the day, relish deeper slumbers at night, boast sharper cognitive faculties, and exude a more serene and positive aura towards themselves and their surroundings. Moreover, exercise emerges as a potent elixir against a myriad of mental health hurdles. The mental bounty of exercise is manifold. It wields a robust influence on conditions like depression, anxiety, and ADHD, offering solace, enhancing cognition, and uplifting mood. From alleviating stress to enhancing memory, from improving sleep quality to fostering a brighter disposition—exercise emerges as a holistic tonic for the mind. Consider the transformative impact on depression: studies affirm exercise's efficacy in treating mild to moderate depression on par with antidepressants, sans the side effects. For instance, recent research from the Harvard T.H. Chan School of Public Health illuminates how a mere 15-minute run or an hour-long stroll slashes the risk of major depression by 26%. Beyond symptom relief, maintaining an exercise regimen stands as a bulwark against relapse. Why is exercise such a formidable ally against depression? Primarily, it orchestrates a symphony of changes in the brain, stimulating neural growth, mitigating inflammation, and orchestrating neural pathways conducive to tranquility. Additionally, exercise unleashes endorphins—neurochemicals that invigorate the spirit and evoke feelings of euphoria. Notably, it also serves as a distraction, granting respite from the relentless torrent of negative ruminations that feed depression. In the realm of anxiety, exercise emerges as a natural antidote, dissolving tension, and fortifying both physical and mental vigor through endorphin release. Any movement aids, yet deliberate attention amplifies the benefits manifold. By immersing oneself in the sensations of movement—the rhythmic cadence of breath, the earthy embrace of terrain—exercisers not only enhance physical conditioning but also intercept the ceaseless flow of worrisome thoughts. The interplay between exercise and stress unveils a transformative narrative. When stress grips the body, manifesting as taut muscles and somatic discomfort, exercise intervenes as a liberator. By triggering endorphin release and inducing muscular relaxation, it unravels the knots of tension ensnaring the body, catalyzing a ripple effect of tranquility that permeates the mind. 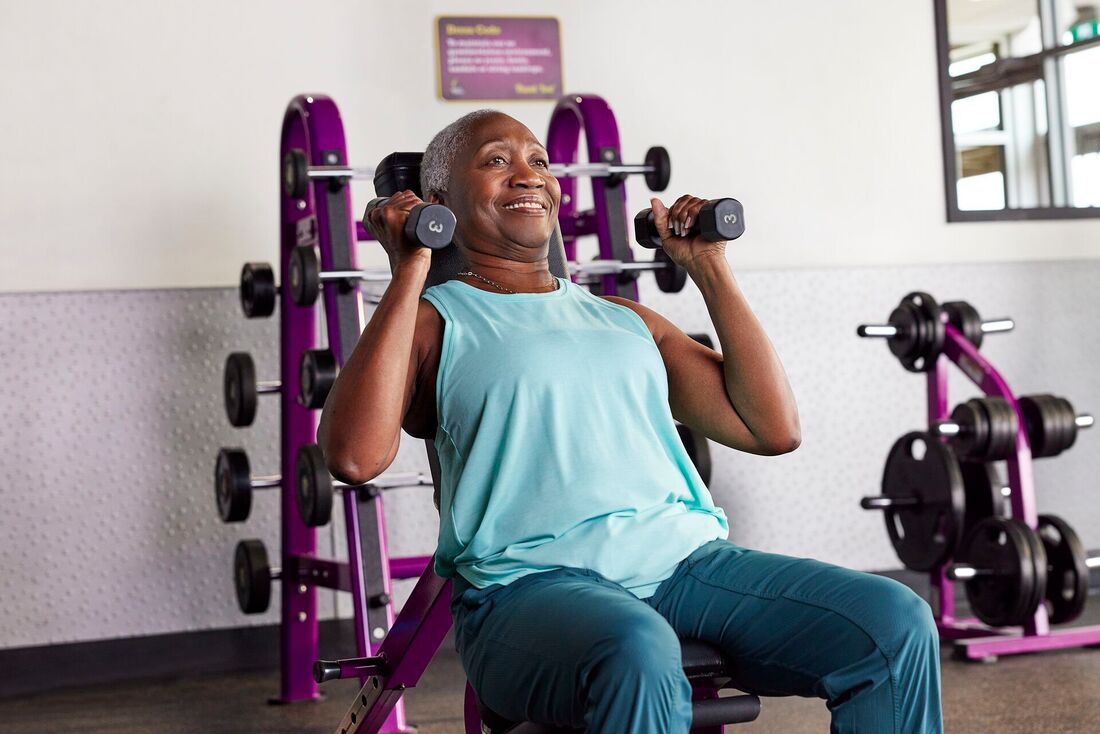 In the domain of ADHD, regular exercise emerges as a potent ally, augmenting concentration, motivation, and mood by elevating neurotransmitter levels critical for focus. In mimicking the action of ADHD medications, exercise unleashes a cascade of dopamine, norepinephrine, and serotonin—neurotransmitters pivotal in honing attention. Thus, exercise stands as a cornerstone in managing ADHD symptoms and fostering cognitive resilience.
The therapeutic potential of exercise extends to trauma and PTSD, offering a pathway to disentangle the nervous system from the grip of immobilizing stress responses. By attuning to bodily sensations during exercise, individuals can coax the nervous system towards a state of fluidity, sidestepping the entrenched patterns of trauma. Exercises involving cross-lateral movement, such as walking, swimming, or dancing, emerge as potent modalities for recalibrating the body-mind continuum. In the realm of cognition, exercise unfolds as a catalyst for sharper thinking and enhanced memory, fueling neurogenesis and staving off age-related decline. Simultaneously, it bestows a boon to self-esteem, instilling a sense of resilience and empowerment. With each workout, individuals invest in their physical and mental fortitude, reaping a harvest of self-assurance and accomplishment. Sleep, too, falls under the sway of exercise's benevolence. Even brief bursts of activity regulate circadian rhythms, promoting restorative slumber. Whether through invigorating morning jogs or tranquil evening stretches, exercise offers a pathway to more restful nights and revitalized days. Embarking on the journey of exercise need not be arduous to yield dividends. Moderation emerges as the golden mean—engaging in activities that elicit a mild increase in effort and body temperature, without veering into exhaustion. The rewards of exercise are not contingent on duration but on consistency and intentionality. For those grappling with time constraints, the concept of "weekend warrior" heralds hope, wherein condensed bursts of activity on weekends yield substantial health benefits. Hence, irrespective of one's schedule, weaving pockets of activity into the fabric of daily life becomes an act of self-care and vitality. Yet, embarking on the path of exercise encounters myriad barriers, especially for those contending with mental health challenges. Fatigue, overwhelm, hopelessness, and self-doubt can conspire to thwart one's efforts. However, by reframing exercise as a non-negotiable facet of mental well-being, individuals can overcome these hurdles and embrace movement as a potent ally in their healing journey. Start small, honor your body's cues, and prioritize activities that resonate with joy and purpose. Cultivate a supportive environment, whether through exercising with loved ones or seeking professional guidance. Most importantly, celebrate each step forward, recognizing that every moment of movement is a testament to resilience and self-care. In essence, exercise emerges not as a chore but as a celebration of vitality—a joyous communion between body, mind, and soul. Through movement, we reclaim agency over our well-being, embarking on a transformative odyssey towards vitality and resilience
0 Comments
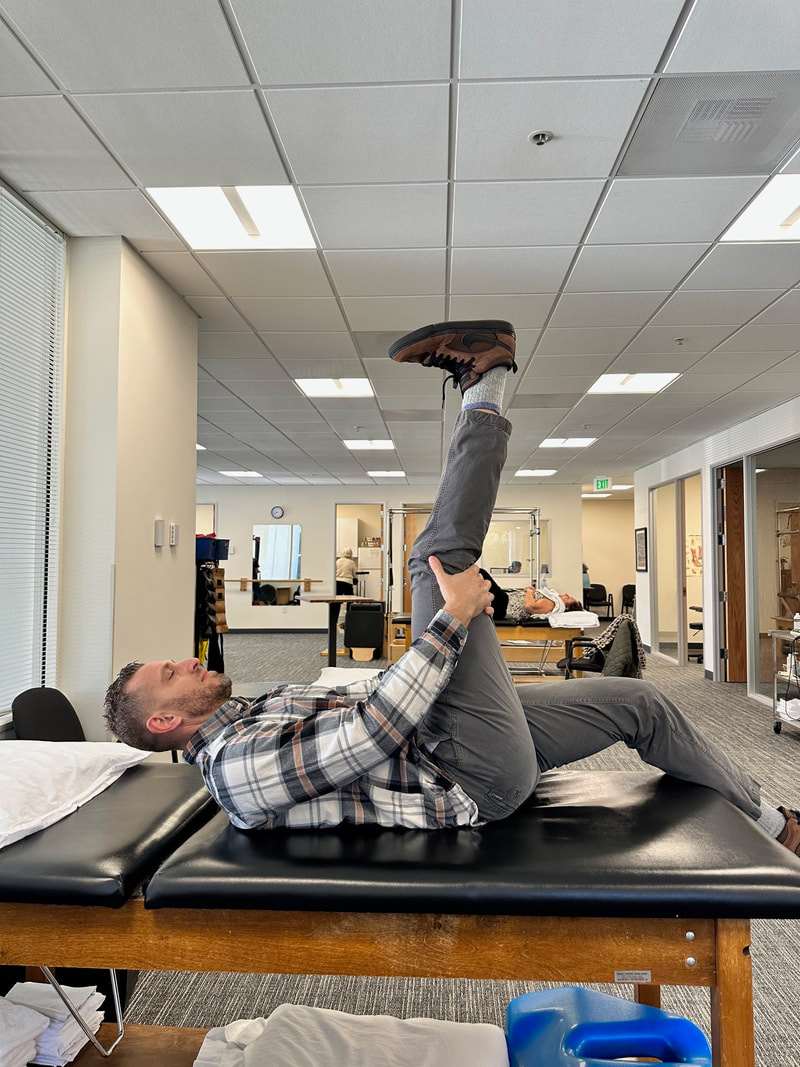
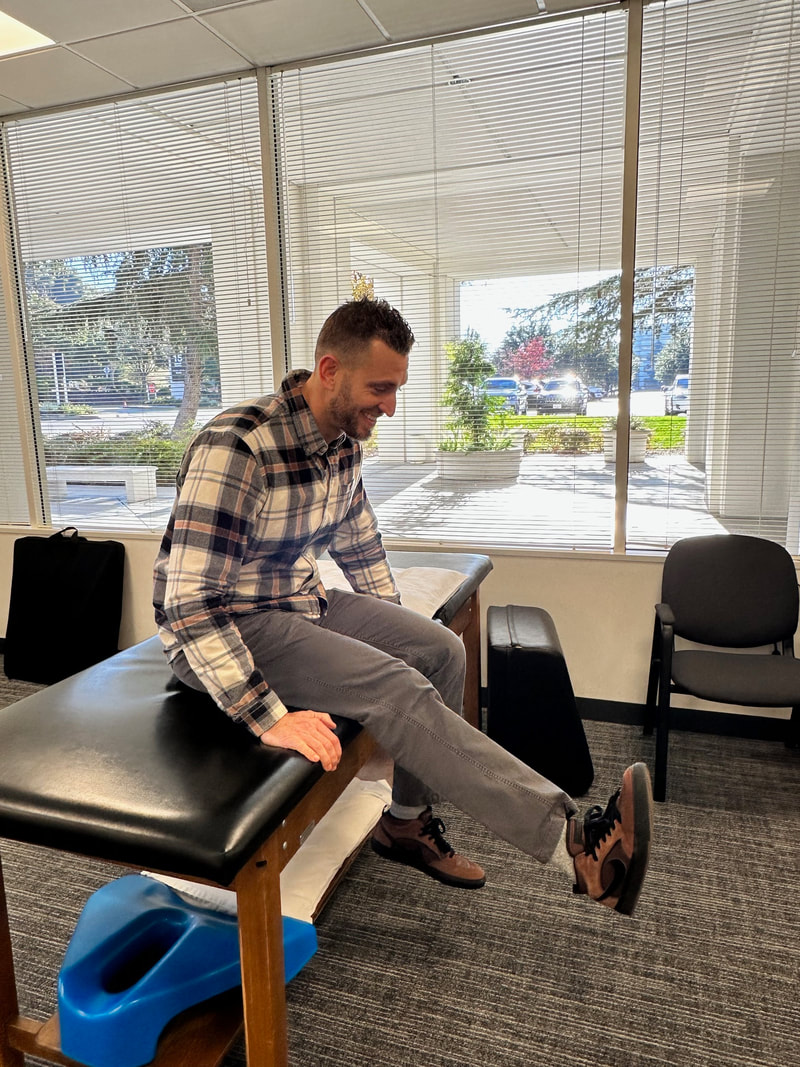
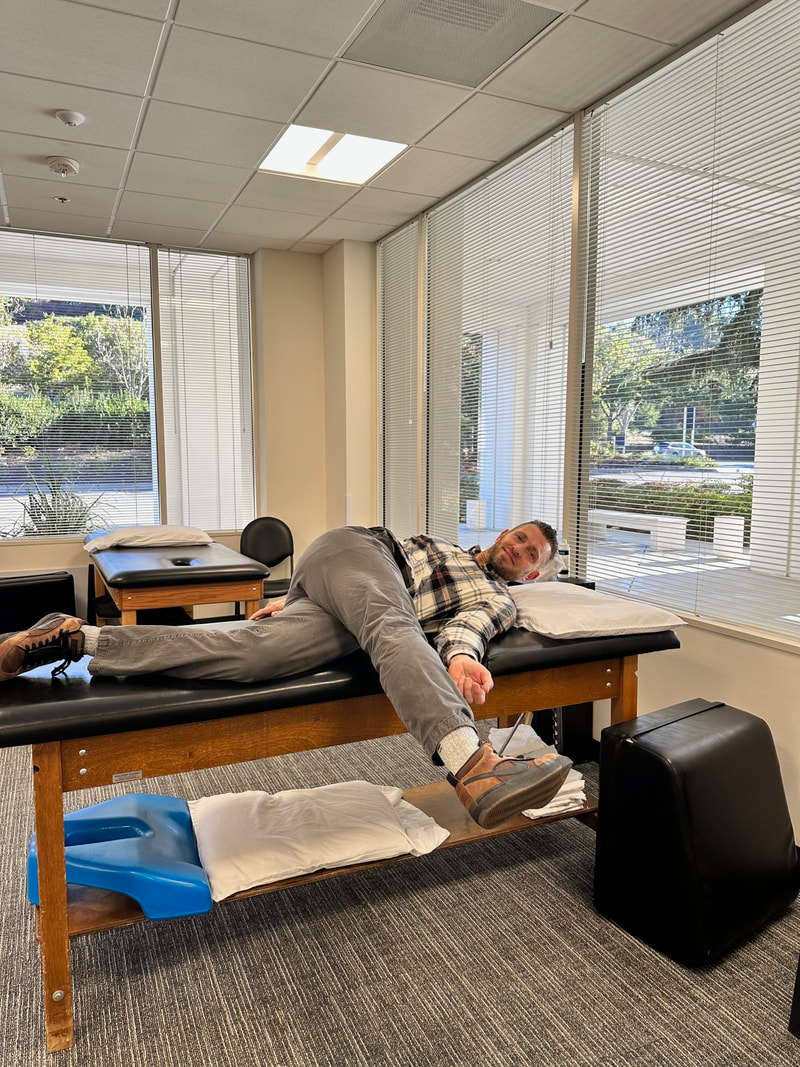
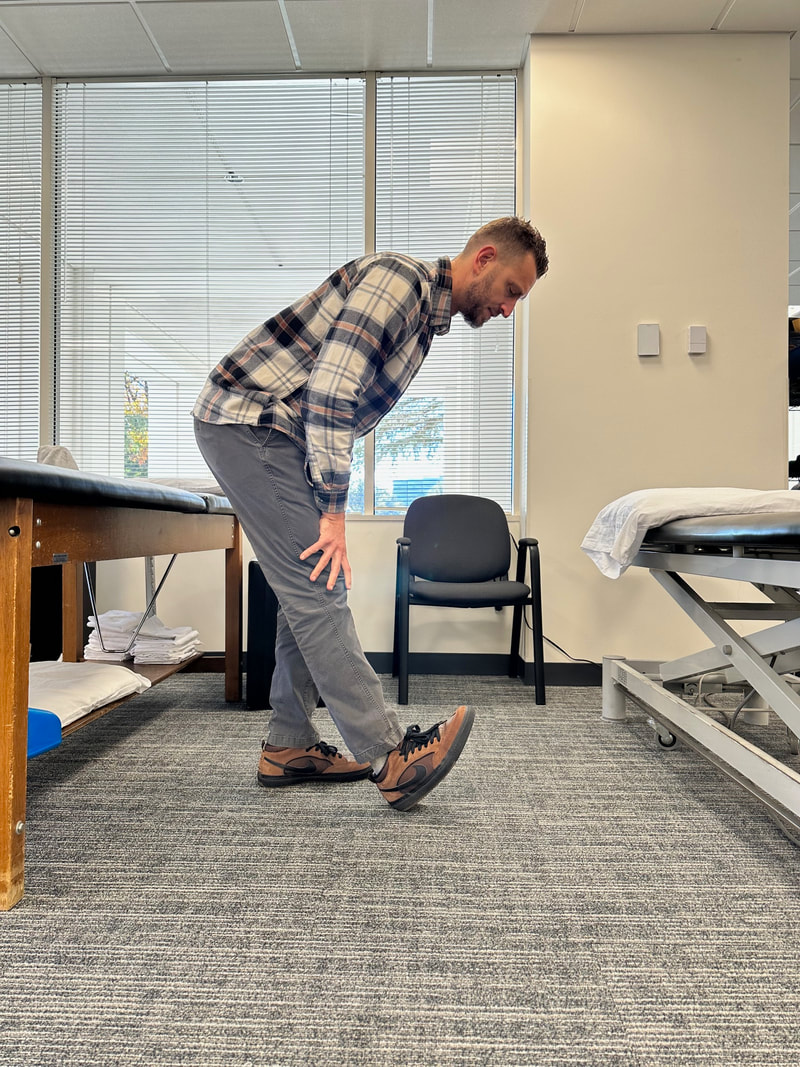
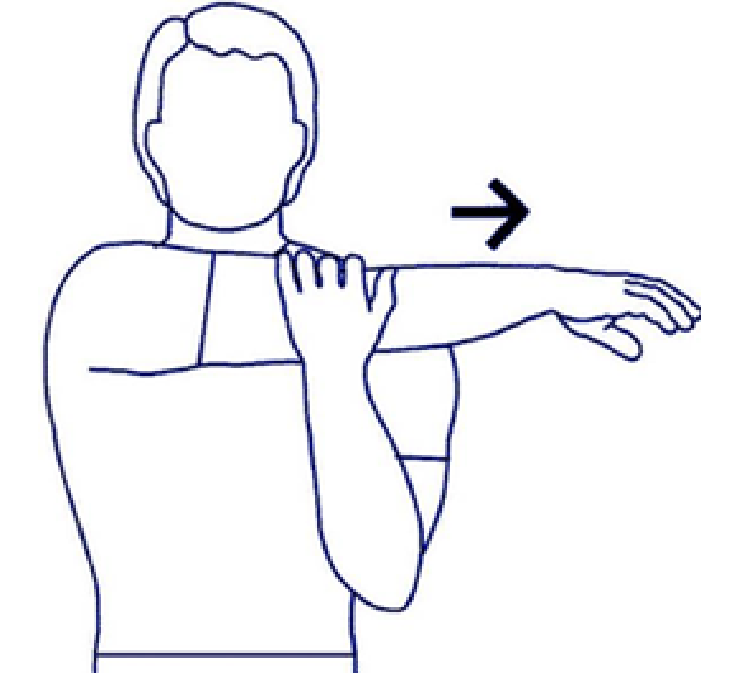
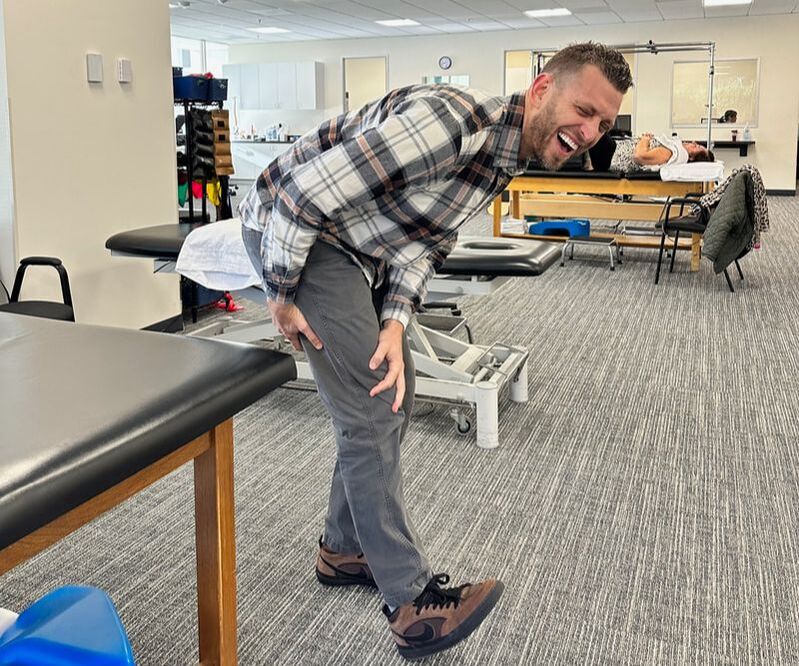 Do you ever experience persistent tightness in your hamstrings despite regular stretching efforts? Many individuals find themselves frustrated with limited progress in hamstring mobility, even with consistent yoga and stretching routines. It's essential to consider the anatomy involved, as the sciatic nerve runs beneath the hamstrings, extending down to the foot. When bending forward, it's not just the hamstrings that are stretched but also the nerves. In fact, tightness in the hamstrings is often misinterpreted as muscle tightness when it may actually be tension in the sciatic nerve. Addressing this issue requires a holistic approach. We've observed significant success by incorporating nerve mobility exercises into our patients' hamstring flexibility programs. So, how can you enhance sciatic nerve mobility? Unlike muscles, nerves can become irritated when stretched, so the key is to perform nerve slides for improved mobility. Imagine the nerve as dental floss, running from the back down through the leg to the foot. The goal is to gently "floss" the nerve through muscles and joints instead of creating tension at both ends. Research indicates that these nerve sliding techniques result in five times more nerve movement compared to other tensioning methods.
Hold the stretch 2-3 seconds for 10 reps. You can do this multiple times in a day when you feel the tightness. I tend to do them prior to working out to help loosen up.
Integrating these nerve slides into your hamstring mobility routine contributes to overall nerve well-being, reduces tension, and lowers the risk of sciatica.  Here is another synopsis confirming what we already know in the orthopedic world: you should go into your surgery as strong (muscle and cardiovascular wise) and mobile as possible. You typically come out on the other end much better and it makes recovery less of a challenge!
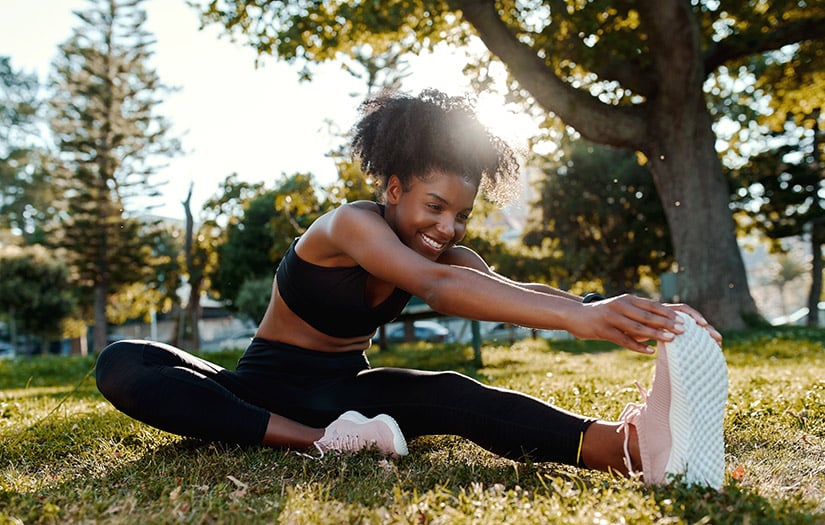
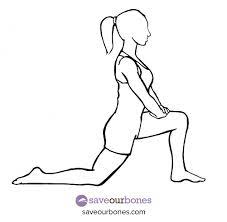
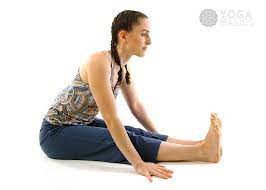
Here is the short article: Policy-makers are being urged to take notice of a University of Otago study that confirms that undertaking a short programme of high intensity interval training before surgery can substantially help with recovery. The study, published in the journal Surgery, reviewed and analysed 12 studies including 832 patients who had undertaken preoperative high-intensity interval training. Such training involves repeated aerobic high-intensity intervals at about 80 per cent of the maximum heart rate followed by active recovery. Lead investigator Dr Kari Clifford says the study included all types of major surgeries -- those expected to last more than two hours or with an anticipated blood loss of greater than 500ml -- and included liver, lung, colorectal, urologic and mixed major abdominal surgeries. The average age of participants in the intervention group was 66 and 67 in the control group. "We have found that high intensity interval training (HIIT) is safe and effective for surgical patients. A HIIT program can meaningfully improve a patient's fitness within four to six weeks, and this reduces postoperative complications and length of stay." The most significant result was the change in cardiorespiratory fitness (CRF) -- a measure of how well the body takes in oxygen and delivers it to the muscles and organs during prolonged periods of exercise. "The pooled results suggest that HIIT increases cardiorespiratory fitness by 2.39 ml/min/kg. This is not only significantly different than standard surgical care, but is also clinically relevant: we know that this level of increase is associated with a lower risk of adverse postoperative outcomes." Generally, post operative complications occur in about 30 per cent of patients, or up to 50 per cent for frail patients. In the study, those who undertook high intensity interval training prior to surgery, showed a consistent reduction in post-surgery complications, such as cardiac complications, pneumonia, and postoperative bowel issues, she says. "Our study's pooled results showed that HIIT reduces the risk of having a complication by 56 per cent, which is substantial; and on average they stayed for three fewer days in hospital." "All of these findings suggest that a period -- even as brief as four weeks -- of pre-surgery high intensity interval training may substantially improve patient outcomes and bring with it robust benefits across patient populations," she says. The next step is to find out how to implement such programmes. "Supervised exercise programs can be expensive, so we are looking at how effective it is to support people training at home or in the community. Funding these programs may save money in the long term by reducing the cost of hospital stay and surgical complications. "In the meantime, I would say to everyone, it is never too late to improve fitness, and this can really make a difference to health outcomes in the surgical context."  We've put together a simple guide on pre and post-workout stretches. Our aim is to help you understand the benefits of stretching, the types of stretches you can do, and the best practices to follow when stretching to prevent injury and improve your overall workout performance. The Importance of Stretching Stretching is an essential part of any workout routine. It helps to prepare your body for physical activity and prevents injury by increasing flexibility and range of motion. Stretching also helps to improve circulation, reduce muscle soreness, and improve overall performance during exercise. Pre-Workout Stretches Before starting any workout, it's important to perform a few warm-up exercises to get your body ready for physical activity. Some pre-workout stretches you can do include:
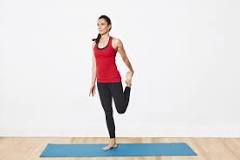
Post-Workout Stretches
Stretching after a workout is just as important as stretching before a workout. It helps to reduce muscle soreness and stiffness, and aids in recovery. Here are some post-workout stretches you can do:
Best Practices for Stretching To get the most out of your stretching routine, it's important to follow some best practices. Here are a few tips to keep in mind:
In conclusion, stretching is an essential part of any workout routine. It helps to prevent injury, improve circulation, and reduce muscle soreness. By following the pre and post-workout stretches and best practices we've outlined in this guide, you can improve your overall workout performance and achieve your fitness goals. Remember to always listen to your body, stretch until you feel a mild tension, and never push yourself to the point of pain.  Last week, the HelpGuide.org, a trusted nonprofit guide to mental health & wellness, put together a great article outlining the many benefits of exercise, focusing more on the mental side.
They discuss how exercise can help with stress, ADHD, and PTSD. In addition, exercise can also help with:
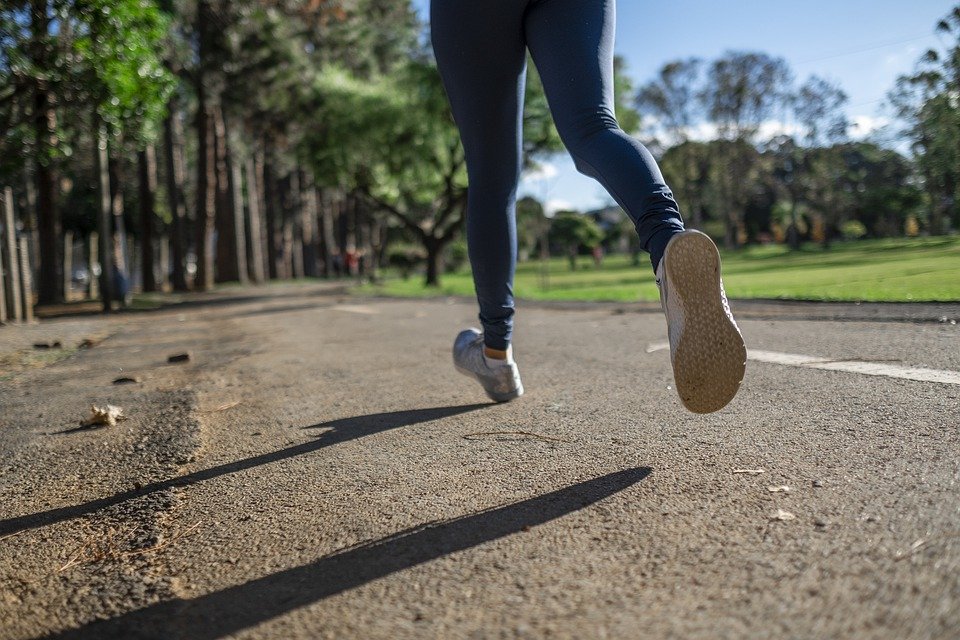 So often in the clinic that running is bad for your knees....But is it?
An article By Science Daily that pulled data from the American College of Rheumatology in fact showed that running as a habitual exercise at any stage in life not only does not increase a person's risk of developing knee osteoarthritis and may even help protect a person from developing the painful disease. Further research shows that running can actually HELP with knee arthritis. The article by thrive Physio plus reminds us that if you are a runner and you have built up your load appropriately over time, your tissues will have the capacity to cope with this load and running can be very beneficial for your joints and overall health. If you haven’t run in a while, there are gradual and progressive ways to prepare the body for these more demanding movements. In summary, if you have not run in a while (or never before), we don't recommend signing up for the next marathon. Instead, easily and gradually progress into a gentle running program so your body and handle and adapt to these new forces. We would be happy to help you out and get you active! Contact me at [email protected] 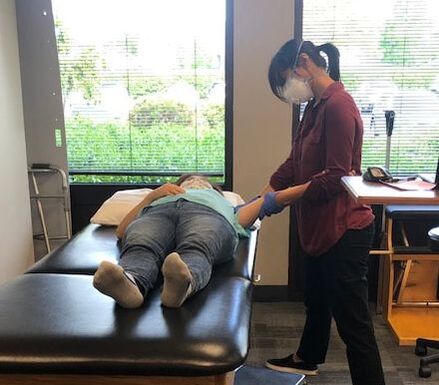 Before Your Visit
Take any lab, imaging, or reports from other health care providers with you that are related to your medical history or current condition. Bring a list of your doctors and other health care providers. Your physical therapist can discuss their findings and your progress with them. Physical therapists partner with other health care providers to ensure you get the best possible care. When you make your appointment, ask whether you should wear or bring a certain type of clothing for your first visit. Don’t wear clothing that doesn’t stretch. Your physical therapist may have you take part in treatment activities during your first session. Financial Considerations Carefully review the clinic's financial policy. If you do not receive it at your first appointment, ask for a copy. If anything is unclear, ask questions or ask for someone to explain the policy to you before starting treatment. The physical therapy clinic will ask you to sign the financial agreement. Read it carefully and ask questions if anything is unclear. The clinic staff will request payment of any deductibles and copayments before or after each visit. Paying these at the time of service will help you better manage health care costs and avoid a large bill after treatment ends. If you need to change how often you have physical therapy for financial reasons, discuss this with your physical therapist. They can explore options and develop a workable plan to help you get the care you need. If you change or lose your insurance coverage, be sure to inform your physical therapist and the clinic's front office staff. What To Expect During Your First Visit Your physical therapist will begin by asking you lots of questions about your health. These will include specific questions about your condition and any symptoms that led you to see them. The details you give will help your physical therapist assess whether you are likely to benefit from physical therapy. It also will help them choose the treatments that are most likely to help you. Your physical therapist also will ask you specific questions about your home or work setting, your health habits and activity level, and your leisure and sports interests. Their goal is to help you become as active and independent as possible and return to the activities you enjoy. Your physical therapist will perform a detailed exam. Depending on your symptoms and condition, your physical therapist may evaluate your:
Your physical therapist may use their hands to examine or feel on or around the area of concern. They also will assess the motion and function of your joints, muscles, and other tissues. Your physical therapist also may check:
A main goal of treatment is to improve or maintain your ability to do daily tasks and activities. Your physical therapist may address pain, swelling, weakness, and limited motion to help you reach this goal. They will check your response to each treatment and make changes as often as needed. Physical therapy treatment also may speed your recovery. Education is an important aspect of your physical therapy treatment. Your physical therapist may teach you special exercises to do at home. They also may show you different ways to do your work and home activities. The goal is to lessen or get rid of the problem believed to be the reason for your pain, strain, or injury and show you ways to stay healthy. Your physical therapist will assess your need for special equipment. For example, they may suggest special footwear, splints, or crutches. They also may advise that you use special devices to help make your home a safer place for you, especially if they find that you are at an increased risk of falling. They will determine what equipment you need based on your situation. They may either provide it for you or tell you where you can find it. If you do need special equipment, your physical therapist can show you how to use it properly. Your physical therapist will share important information with your doctor and other health care providers at your request. Your physical therapist will recheck your progress often throughout your plan of care. They will work with you to plan for your discharge from physical therapy when you are ready. Make sure to talk with your physical therapist about what to do if you have questions after discharge or if your symptoms or condition worsens. Your physical therapy visit may include working with a physical therapist assistant on exercises prescribed by your physical therapist. Physical therapists and PTAs work together and with other health care providers to make sure you get the care you need. Get the Most Out of Physical Therapy You will get out of your physical therapy sessions what you put into them. It will take a certain amount of effort on your part, as agreed between you and your physical therapist, to get the most benefit from each session. Here are four tips to help you get the most out of physical therapy:
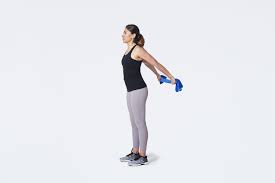
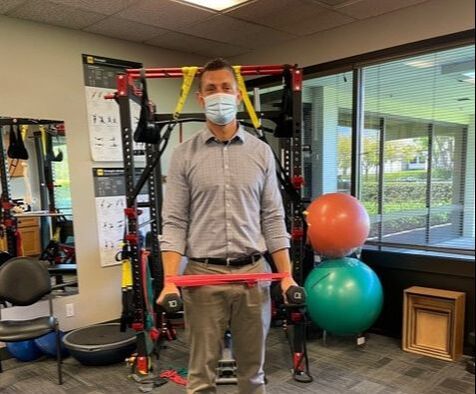
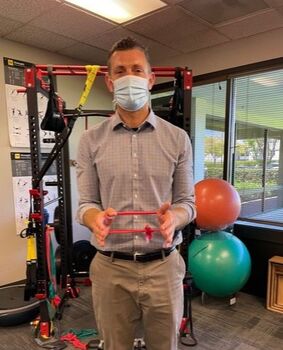
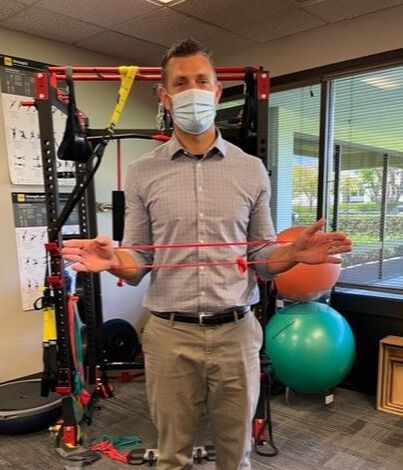
Your physical therapist also may determine that you might benefit from seeing another specialist or health care provider. They may recommend doing so in addition to having physical therapy or before starting physical therapy treatment. Some physical therapists also provide annual visits to promote health and wellness. They may ask you to return for a follow-up or yearly visit. You can contact a physical therapist directly for an evaluation. The following is a condensed article from ChoosePT and can be fount at Preparing for Your Visit | Choose PT  I love a quick, effective exercise bundle that targets specific muscle groups. It just fits in so well with the chaotic lives we all are living :) Try these 3 shoulder exercises. 10-20 reps each, one after the other. Rest after each set and get through 3 sets. Equipment: resistance band and weights. To progress or REgress the exercise, all you need to do is lower the resistance of the band and/or lighten the weights!! SHOULDER FLEXION Start with the band around both wrists and pull apart, shoulder width apart. Grab your weights (not necessarily needed) and lift arms up just past 90 degrees and return. 10 reps.
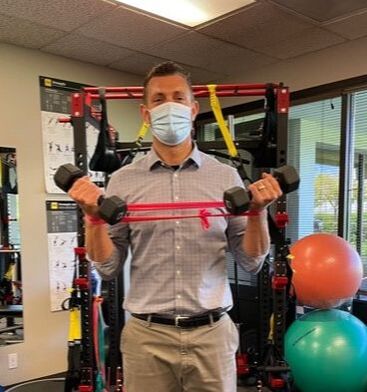
BICEPS CURLS Start with the band around both wrists and pull apart, shoulder width apart. Grab your weights (necessary) and perform a biceps curl MAINTAINING your hands hip width apart and return. 10 reps.
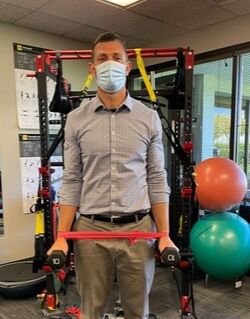
SHOULDER EXTERNAL ROTATION Start with the band around both wrists and pull apart, shoulder width apart. Grab your weights (not necessarily needed) and bend elbows to 90 degree. While keeping your elbows bent pull the band apart and return. 10 reps.
Again, 10-20 reps each, 3 sets. Easier: lighten band, lower weight. Harder: stronger resistance, heavier weight.
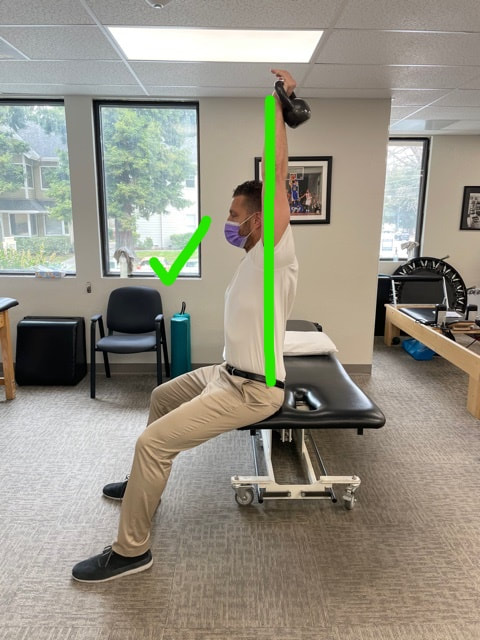
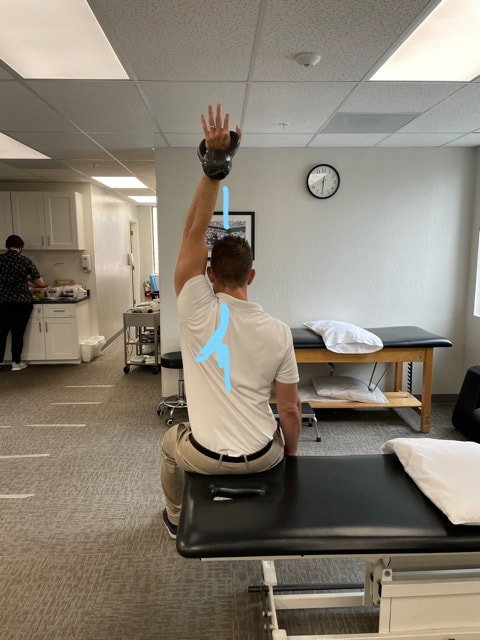
I hope you enjoy this little burner and have a great weekend!! Dominick 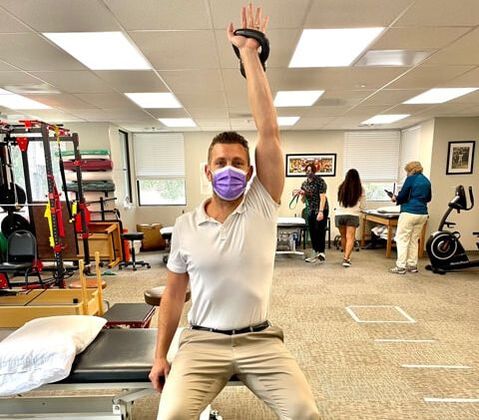 The overhead shoulder press is a GREAT exercise that helps strengthen many muscles in the shoulder, back, and core buuuuuut that comes with a few caveats. First, you need to see if you have enough range of motion (ROM) to do the exercise in the first place. Once you are good there, you want to make sure your are performing the exercise correctly, finishing in the proper shoulder slot. Too often we see the overhead press look like: 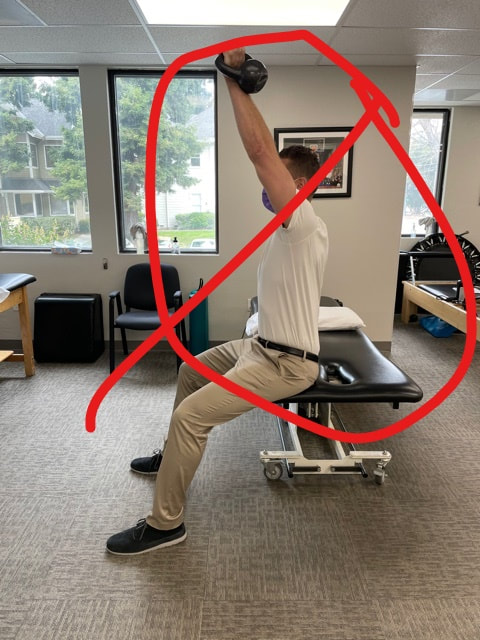 The weight is away from your center of gravity, putting excessive pressure on the shoulder joint and the anterior structures. Finish the exercise by pressing the weight directly overhead, imagining pushing it through the ceiling. This will force you to use the muscles around your shoulder blade to stabilize the arm in place. Make sure your elbow is fully straight, letting the triceps join the party :)
If you have any questions, please let us know!
[email protected]  A couple other ways and places to schedule (and feedback from patients has been better with these locations!) SAFEWAY: https://www.safeway.com/pharmacy/covid-19.html You can put in your zip code and will get you to the closest Safeway that offers the vaccine. SAN RAMON FD: https://www.firedepartment.org/.../Compo.../News/News/240/17 Hope this helps! 1/15/2020: Registration Instructions to Receive the Vaccine
To our knowledge, at this point, there are 3 ways to get the vaccine. First, through Kaiser if you are a patient with Kaiser insurance. Second, through John Muir Health. Per a email blast from John Muir Health, if you have a John Muir Health account, they will contact you in a 'variety of ways including MyChart messages, email, text messages and phone calls.' They are going to start with patients 75 years and older and then work their way down. Third, through Contra Costa County Health Services, which is how employees from SRVPT scheduled their vaccinations. Many of us have already had the first shot and most of us will have had it by the end of next week! For those residents 65 and older please click below to register to get the vaccine from Contra Costa County Public Health website. After you complete the online registration form the county will determine if you qualify for the vaccine and send you an invitation to make an appointment. https://forms.microsoft.com/Pages/ResponsePage.aspx... The CDC has a lot of great resources about the vaccine as well as the Contra Costa County Health Services page. Certainly, consult with your doctor if you have any questions. Registration Instructions to Receive the Vaccine https://www.cdc.gov/coronav.../2019-ncov/vaccines/index.html https://www.coronavirus.cchealth.org/vaccine |
AuthorThe therapists at SRVPT have a variety of backgrounds and are interested in sharing our knowledge with you! Check out their bios for more specific information. Archives
April 2024
Categories
All
|


 RSS Feed
|
San Ramon Valley Physical Therapy proudly serves the Alamo, Danville, San Ramon, Dublin, Pleasanton areas, along the 680 corridor.
© COPYRIGHT 2023 ALL RIGHTS RESERVED |